Slow Progress

You would think that having lived in my house for several years now that I would have decorating and projects done. You would be wrong!! I’m probably one of the slowest project people that anyone has ever seen. At least The Engineer and I have taken advantage of the past few snowy weekends to get some linger projects decided on and moving on down the road to completion.

We’ve been working on getting the man loft upstairs completed for months. I do still have one cabinet to refinish, but the weather just hasn’t been cooperative for painting and staining furniture in the garage. Until the cabinet is done we can’t really put away the movies and gaming systems…or hang any of the taxidermy work on the walls, so it’s just been easy to leave the whole room a slight disaster area. We’ve made major progress this weekend though…..we’ve finally picked a paint color!

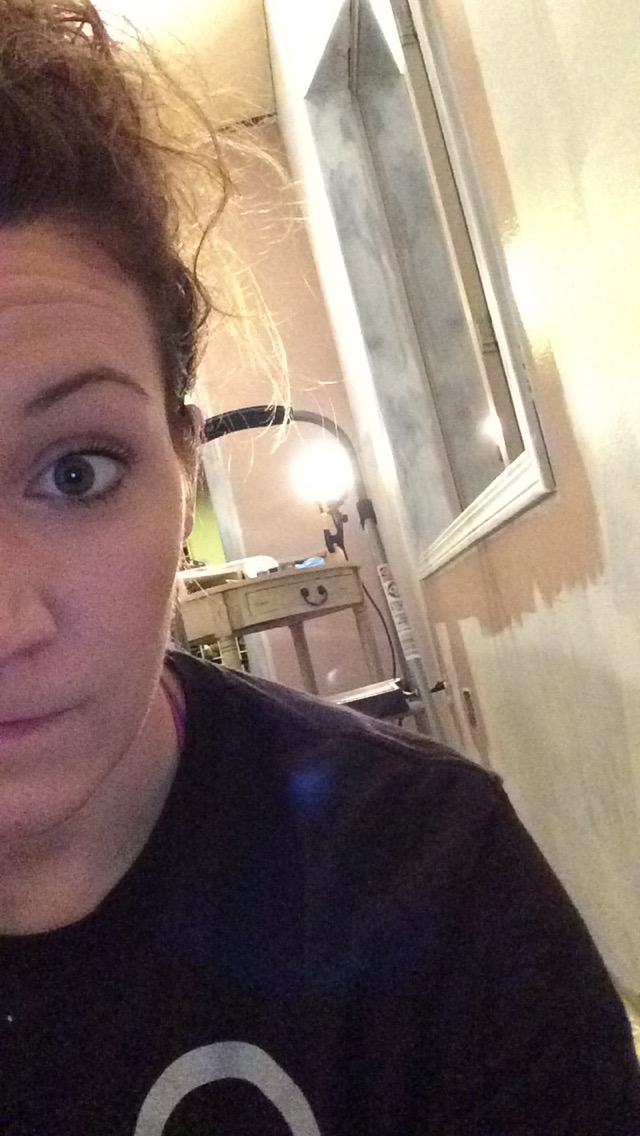
After months of collecting random paint chips and scrolling through Pinterest boards, we’ve finally nailed it down to 3 colors…..or maybe 4….it’s hard to say really.

I think we’ve decided on Olive Sprig…although all 4 are very similar..and minds could still change!

As you can tell, we pretty much have it sorted, just need to settle down on the exact shade of green we like. The Engineer would have preferred grey or blue but we had to let those colors go. None of the grey samples looked nice against the existing townhome beige. The room is so angular and open that somewhere the new wall color is going to have to butt up against the existing beige. The blues looked nice against the beige walls, but they didn’t do much to accent the dark wood, metal, and black concrete tones we have already in the room. Green is really where it’s at I think!

One loft project that we have finished up is refinishing my desk chair and mounting some floating shelves my Grandpa made. I guess at least my small corner of the loft is finished. The first step of my chair makeover was 2 coats of Annie Sloan Honfleur and some light distressing with dark wax. That was the easy part for me, just your standard rags to riches furniture rehab story! I decided to try my hand at recovering the cushion with some scrap hide, and that was really a bit of an adventure.

Happy to be reusing handmade, Peterson family heirlooms!

If your hide hasn’t been tumbled by the tannery to make it soft and pliable, you’ll have some labor to put into it. First, you’ll need to let it soak for an hour or two. I just put the hide in the bathtub with a few inches of water and let it hang out to absorb. This will make the hide seem soft, but at this point if you just let it dry it will go back to being as stiff as a board. To really help the fibers loosen up and plump, stash your wet hide in a plastic bag overnight. Get a good nights sleep, because in the morning you’ll have work to do!

Remove your hide from the bag. It will be damp, but shouldn’t be dripping. I left my bag and hide in the sink in case any water didn’t absorb and drain out….didn’t want any surprise puddles in the morning! If you need to stretch your hide to increase its size slightly, now is the time to do this. Mine was large enough already, but we did give it a bit of a stretch for good measure. Again, it was freezing in the garage and I didn’t necessarily have enough scrap wood laying around to build a large enough frame for the hide…..but I did have a rather large, and rather robust cardboard shipping box!!

Once your hide is stretched to size, you’ll need to do something to soften it. This is best done by beating or tumbling to mash and realign all the fibers. I wasn’t about the toss it into my dryer with small boulders, so I used the next best thing….a paint remover!?!? All of these tips and tricks were provided by a profession taxidermist…..so it’s gotta be the truth! I was told to just work it over the hide until it was soft. I used an African hide, and I’m here to tell you that some parts of it were so thick they never softened. We did the soak, stretch, and tenderize process twice….it’s still a very stiff hide, but it got the job done!

Beat until tender!

We decided to start the upholstry job with a slightly damp hide. The hide was never going to get evenly soft enough, especially because some portions were just so thick. This was extra unfortunate because there was no way we could align the hide on the chair cushion so that the thickest portions weren’t used. Momma Mishappenings was staying with us that night, and she has some fabric upholstery experience which was nice to have…because I had no idea what to do really!

We stapled the front side down first so that we could pull and put some tension on the hide. It quickly became clear that we needed to cut out some of the extra hide bulk in the corners so that they would lay nice. I wish I could tell you a specific shape or pattern to cut, but honestly I just sort of whacked out whatever bits and pieces we needed to make the corners lay nice as we went along. It doesn’t look overly pretty, but it fit and we did eventually get all 4 corners trimmed out and stapled down. At this point, we left the whole thing to dry out for a few days. The hide will shrink slightly as it drys, and we used that to our advantage. Some places that had seemed too big and loose tightened right up once it dried. There was one pretty bad bubble of extra hide on the front by one of the corners and I was pleasantly surprised to discovered it had totally disappeared once everything dried!

Once dried I was going to screw it back onto the chair frame, but it needed one final step. Even though we had cut the corners and tried to get them to fold nice and even, they still needed a bit of work. I used a hammer on the dry hide to beat and soften up any of the hard edges and bulk left in the corners. Anywhere the hide crossed over another piece of hide I gave it a pretty severe whacking. It really did help to form and soften up all the edges. I also added a few more staples and hammered them all in for good measure.

Carefully screw it back into the chair frame, and you’re ready to get stuff done behind your desk! You’ll have to screw up through the hide, so just proceed slowly and cross your fingers you don’t hit a staple. I didn’t, but that’s maybe just beginners luck. The hide was a bit stiff and crunchy the first couple times I used the chair, but it has broken in nicely. Also, I was worried about sitting on the hair, but it doesn’t seem to be shedding and doesn’t get misaligned if you’re moving around in the chair. Even if hair does start shedding, it should just add to the aged and distressed look!

Expanding Small Spaces

The Engineer and I have been on a bit of a home improvement kick.  Fitting two people’s stuff and design tastes into a single home isn’t always easy.  In an effort to make keep the house somewhat organized, and preserve my own sanity, we’ve really had to try and maximize all the storage opportunities in the house.  I’ve been meaning to write this blog for awhile, but it seemed like we just kept doing projects so I kept thinking I’d wait.  I think we finally wrapped up all the little projects, and several of the big projects are well on their way!

Our biggest summer project was expanding the patio!  The slab that was poured for my patio is only 6ft x 8ft.  Some of the units in my HOA have big, expansive patios….I guess that just wasn’t in the cards for my specific unit.  It was fine when it was just Scout and I at home, but even for just us it had always been small and crowded.  Then The Engineer came, and then we bought an umbrella, and then we got a big grill….and pretty soon we were sitting on top of each other trying just trying to spend time outside on the patio.


Lucky for our bank accounts, The Engineer can occasionally snag sample concrete mix color and finish pavers from his employer!  Plenty of precast buildings are grey, so we decided to extend the patio slab out with two rows of 1ft x 1ft pavers on each side.

salb

Such style he’s got that man of mine!

Honestly, the hardest part of the whole project was getting the landscaping rock out of the area.  In my brain I would just be able to scoop it right up with a shovel and move it to other areas of our landscaping that were a bit light on rock.  I’m not sure if you know this…..but rock doesn’t really shovel.  It turned out one of the sides was severely lacking in dirt, but a layer of pea gravel below the paver base brought it back up to grade.

side 1-2

Actually placing the pavers was pretty easy.  Pour out and smooth a think layer of paving base and smash it down firmly.  They make a tool for this…..or just use your feet in heavy construction boots…..that’s the method we used!  After its smooshed down evenly, use a garden trowel to sprinkle down another thin layer of paver base.  Set your pavers down into the base and press or stand on them to settle them down into the base.  You might have to trial and error adding some base or maybe removing some to get everything level.  I think we did quite well for having never laid pavers before.  Everything seems level and graded to drain correctly….time will tell though, they may settle over the winter and we might have to adjust them in the Spring.

img_9932.jpg

So much space for activities….and a lurking pupper in the doorway!

Inside projects have been centered around keeping spaces organized, and keeping things from exploding out into the living room and dining room.  Single me was a chronic “toss wet laundry out onto stair railing and chair back to dry”.  It was always annoying to me, but somethings just don’t belong in the dryer so I just ignored the fact that I was annoying myself.  Cut to my laundry, The Engineer’s laundry, my hats, The Engineer’s hats and a shared closet and I was slowly loosing my mind at the general disheveled state.

Step one was a closet clean out!  Nothing will help you get rid of unwanted clothes faster than the feeling of not giving someone their fair share of the closest storage.  I still feel bad about this…..my crap still takes up way more than half of the closet space.  He tells me it’s fine, but I feel bad in spite of that. So, every month or so I go in and try and purge a few more items.  To further assist we build some strategic storage….a hat rack for the closet, and two drying racks for the laundry room.

I had previously bought one of those back of the door hat hangers….it was garbage.  The hats fell off all the time.  Matters were made worse by the fact that it made opening the closet door impossible.  The hats took up so much space behind the door, plus I already have scarf storage behind the door.  The whole thing was just a mess.  Some on sale hooks and a stained 1×4 later and we have easy, out of the way hat storage!  The rack we installed matches two very small hanging racks that were installed in the closet before I moved on.  No more falling down hats and no more me throwing tantrums cuz the hats are always all over the closet floor!!

closet.jpg

The closet isn’t well lit….but you get the idea.  A lot of things happening in a small space!

The hanging racks on the laundry room have honestly made a huge difference!  I can hang things, I can lay things on the rods, hook smaller items on the ends….it’s just such a space saver!  I did add a small dowel inside the hanging bar to help it hold up against the weight of all the wet clothes, but depending on the length you decide to use that might not be needed.

There is a large hanging bar installed under a large shelf on the opposite wall of the laundry.  I used to use that for all our shirts that needed to be hung to dry, however The Engineer’s gun safe has taken up a home under the hanging bar……so that sort of ruined that hanging spot.  There is still a bit of room above the safe….so all my bras get hung on hangers above the safe!  I’m sure it was always his goal to have a mid-sized collection of bras perpetually hanging above his gun safe!  🙂

laudry-2.jpg

More stained 1×4 and just some cheap curtain rods…HANG ALL THE THINGS!

The garage is a whole different world of organizational nightmare.  There was a period of time when my 2 car…..very small for 2 cars but still technically can fit 2…..garage barely had room for my GMC Terrain.  There was just a giant horseshoe shaped ring of stuff around the edge and a section in the center that I could park in.  IT DROVE ME BATTY!  I’m a bit crazy about feeling organized I know, and I know that my weirdness about the issue drives The Engineer nuts sometimes.  I can be perfectly fine living in disorder and chaos….until one day when I’m not.  The house can be filthy for weeks and then one day I will just snap and start power cleaning like a wild Tasmanian devil…..

Image result for tasmanian devil cartoon cleaning

Get outta my way I have shit to clean!

So…..we built a shelf….a really big 6ft x 3ft hanging shelf in the garage .  It made me feel better to get stuff up and off the ground.  We will have more shelves to put up and some reorganizing to do…..I would like if all my Christmas decor could be in one spot instead of scattered around on different shelving.  But, getting this stuff up and organized has made a huge difference.  I think that’s how you know you’re becoming old and lame…..when cleaning and organizing a garage becomes a major source of calm and happiness in your life.  Ughs

garage-2

JUST LOOK AT IT….IT’S AMAZING!

It’s so much stuff up and organized!  Do you even know whats up there?!  Well let me give you the run down…..

  • 24 duck decoys in bags….if you don’t hunt you might not know….but these are full sized ducks….24 DUCKS!
  • 2 tents
  • 2 sleeping bags
  • air mattress
  • 2 storage totes of our hunting clothes and camping supplies
  • 4 hunting bags and backpacks
  • other small hunting and camping accessories

Now imagine all of that strewn out all over a garage floor…total garbage!  It’s so pretty and organized…..AND I LOVE IT!  And would you look at that….more stained 1×4 with hooks!  We added easy storage for our hunting boots and his waders.  We also have hooks we can use for things when we use them more frequently.  For example, now that hunting seasons are kicking back into gear, the backpacks will get moved down onto the hooks so that we can access them without a step stool whenever we’d like to head out to the field.

I’m totally sitting here nerding out about how excited I am to have gotten all this organized.  Look at it this way….I’m so excited about getting organized that I felt the need to tell you all about it!!  It’s not like anything we’ve done to try and keep the house organized is crazy or a brand new idea.  Maybe it will show you that you don’t need to hire a professional organizer or spend a ton of time and money on supplies to get started organizing a space that’s a source of frustration for you.  Just pick an area you’d like to improve, break it into small pieces if need be, and then just go for it.  In our case it was just making the decision to get started and then making a trip to Menards for the supplies.  Just create a place for things to have a “home” in….hooks, shelves, cubbies….whatever fits your style or needs.  And don’t forget your new mantra…..ain’t nothing a 1×4 and some stain can’t remedy!

Well…..That Did Not Go As Planned

I’m on my own for the weekend.  The Engineer is off on his yearly West River mule deer hunt with a friend, so Scout-A-Roo and I are having a girl’s weekend.  Friday night started off strong with neither of us moving off the couch till bedtime.  Our Netflix and chill game was super strong last night.  Not that The Engineer and I ever fight over the remote, but he isn’t necessarily interested in the shows I find interesting.  Last night was a British Royal Family sort of night.  I don’t know why I’m so interested, but really any documentary about monarchies and history I’ve always found very interesting.  That’s maybe a bit un-American of me, but you can’t help your interests I suppose.

Any who……I was awakened by a text early this morning from The Engineer that they had arrived at the hunting field.  Since I was awake anyway I decided to hit up the gym.  Single girl life was coming right on back to me!  Good workout followed by lounging and a good breakfast and some coffee is the stuff my weekends used to be made for.  Nothing like a piece of avocado toast with two poached eggs to start off a Saturday!

I realistically should have just stayed on the couch and maybe done a couple loads of laundry today.  But did I do that……nope, cuz I had to be stupid and over achieve!

94c522eacfb91acb0e3a219fc4c7891fc40ea991291586b02c47f954a99effac

When Momma, The Engineer, and I put up my crown molding the other weekend, we obviously created a lot of nail holes.  Since we own a nail gun and we basically had little to no idea where the studs were until the end…..more nails are always better.  You think that anyway, until you have to fill holes.  I figured I needed to do something with myself other than Netflix and chilling all weekend so I decided to tackle filling all the holes.

I have several thoughts on spackle.  You may or may not what to hear them…..but it’s my blog and I do what I wanna so here it goes!

  • Why does it have to be so smelly?!
  • Crumbles……as far as the eye can see!  This is the contributing factor to my failure later in the day.
  • I have no idea what the ideal texture of spackle is supposed to be, but I’m quite sure mine is never right!

To be fair, I’m pretty sure that my spackle was a bit dried out, which probably didn’t help the severe crumble issues, but who’s gonna buy a new container for nails holes?!  As it is I’ve used my container twice and it’s still basically full.  I did blend in a little water which made it a bit more workable, but that just made the smell come out.  It’s probably the worst stuff I’ve ever had to use inside the house.  I’ve used paints and stains that smell better than this crap.  Why has no one else ever complained about this and gotten it changed?!

So there I am…..red dirt country music playing in the background……filling the most difficult holes first.  The most difficult holes belong to some fancy oak trim we added to the door frames in the bathroom.  The trim and my nail gun didn’t at all get along, and this lead to some cracks and other less than desirable spots to fix.  I’m cruising along scooping out little BBs of spackle and working it into holes when all of the sudden….SLIVER!!  Thank you cracked up oak trim for impaling me right in the middle of my spackling finger!

VoZ4q


I was semi tempted to just give up at this point….but ya know I didn’t have anything else to be doing really.  Plus, it’s gotta get done sometime I guess.  I’m a bit convinced that the thing that stopped the bleeding was that the hole got speckled shut….but ya know….two birds one stone I guess.  I got all the holes filled and managed to smooth out a couple seams in the crown.  I was tempted to fill in a couple of the coped corners, but given the questionable state of my spackle I decided to pass on that for now.  The plus side was that right in the middle of my spackle session The Engineer got his deer!  Between his buck today and the rest of his elk meat, we should be set for red meat for quite some time!

IMG_1069.jpeg

Just look at that rack!  Would ya just look at it?!

My intense spackle session produced plenty of crumbles that needed to be vacuumed.  Also, there may or may not have been some epic, epic fur bunnies squirreled in and around behind the toilet.  Whoops!  So, riding my wave of over achieving and generally superb adultiness….I of course decided to clean up the disaster area.  Here is where the real nightmare of the day started.  If I thought that semi dried out spackle was a disaster….this was upping the game.

So there I am…..just trying to be my best adulting self….and I sucked up a toilet bolt cap!  Seriously, this is what happens when you clean……things just go to crap.  But ya know those little white bubble things that cover up the bolts that hold your toilet down….yea mine aren’t attached anymore.  And ya know how sometimes ya forget…..well I forgot.  Ya know what vacuums and vacuum hoses really don’t like…..toilet bubble caps being sucked forcefully into them.  Getting a toilet cap outta my vacuum hose wasn’t really an activity I had planned on doing, nor had any idea how to do.  I basically ended up having to massage the cap all the way through the hose to the other end because the opening was larger.  I’m not sure if you’re aware how much random dust and crap are in your vacuum hose.  I wasn’t until I started working on my hose massage skills.  Ughs, so much crud……crud piles as far as the eye can see.  At one point I tried hooking the hose back up to the vacuum and using suction on the cap….it was futile.  I can’t at all recommend that technique.

Giant_Snake

Accurate depiction of me working on my vacuum hose.

I decided to celebrate my day of accomplishments with candles and a bath bomb.  My candles didn’t want to stay lit, and the bomb turned my bath water into something that closely resembled glittery pond scum water.  However, it smelled good and was nice to chill a al my former single girl self.  It wasn’t the exact weekend I had in mind, and things didn’t go as smoothly as I would have hoped, but everything came together in the end!

Making a To Do List Your Bitch

I’m tired, sore, and don’t feel like leaving my couch for a few days…BUT WE GOT SO MUCH DONE THIS WEEKEND!

Momma MisHappenings came up Friday morning and we started the crown molding project in my bedroom.  We decided to put in a three piece crown, because Momma MisHappenings really likes molding and feels like you can’t ever over do the molding.  I also like molding, probably because I grew up in a house filled with nice, homemade moldings.

I don’t have the skills required to create molding from scratch.  I have just enough talent to run a miter saw and a nail gun.  Momma did all the coping…..which is really an advanced maneuver.  The Engineer and I did most of the cutting and installing, atleast on Saturday and Sunday.  Momma and I did all the wall pieces on Friday while The Engineer worked.  Almost none of my home improvement projects have gone as smoothly as this molding did!  All three pieces were cut, coped, and install by noon today!  I originally had visions of getting the bathroom all done too, but A. I didn’t buy enough of the first two pieces of trim and B. There are way too many corners in my bathroom and they take a decent amount of time to get fit nicely!

IMG_9043IMG_9042IMG_9041

The nail holes all still need to be filled and touch up paint needs to happen in several places, but all in all the whole project went pretty well.  Molding is a fairly complicated process, and there are plenty of old world technical skills required.  Most of our issues revolved around the fact that the actual crown pieces came from two different production lots.  They were just slightly different in their angle and profile.  However, slightly different is one thing when the pieces are laying flat.  When you are trying to cope and fit corners evenly and with no gaps…..slightly different quickly changes to a huge pain in the ass.  With some extra sanding and filing we got pretty decent corners all around and I can touch up the small gaps with caulk or spackle before I retouch the paint.

I won’t explain in detail how to do the crown…..mostly because other people can do it much better than me.  Again, I’m rolling with just enough skill to get things done, but my teaching abilities are not really up to par.  If you’re interested in installing molding I’d recommend The Joy of Moldings.  He has an excellent blog that will teach you how to cope corners and how to layout the pattern for your crown.

I’m not as glue happy as The Joy of Moldings guy.  My Dad only ever glued scarf joints….never coped corners and never ever did he use glue to attach moldings to walls and ceilings.  I don’t have the advantage of knowing how my townhouse is constructed, and because I didn’t buy a stud finder until we were 2/3 of the way done with the molding, I did end up adding some panel adhesive onto the cornice pieces on the ceiling.

My Dad also never used a nail gun, but he was faster and more skilled.  I need to make up time somewhere, and shooting in nails works fine in that capacity.  Plus, since I didn’t originally know where the studs were, after we bought the stud finder at Cosco I went around and shot in a bunch of extra nails actually into the studs.  More holes to fill I suppose, but when the nails are that easy to install I suppose you get a bit liberal with them!  However, shooting nails around willy nilly has it’s downfalls, and just like every other time we’ve attempted a project pieces had to be ripped down and nails pulled out.  Nothing has been as bad as the time I nailed my pocket door open…..but still……struggles were had.  It was nice to get the project wrapped up this weekend.  Today is my parent’s wedding anniversary, so it was nice to spend the weekend with my Momma doing something my Dad was so skilled at.

It actually worked out really well having a tube of panel adhesive open.  Saturday morning, the guest bed upstairs broke.  The frame itself was purchased by my Grandma when she was still living at home with my Great Grandama.  So I’m sure it predates her marrying my Grandpa.  My Uncle had added a couple pieces of wood to act as risers for the box spring supports, and one of those old pieces shattered.  Luckily we were able to cut some scraps into new risers and glued the whole thing back into place.  I also used a small amount to reinstall a loose kick plate in the kitchen.  One bedroom of crown molding, a kitchen reinstall, and a bed repair…..not a bad day in the life of a $3 tube of adhesive!

Another item that got checked off the to do list that has been looming for years is the gallery wall in my dining room.  The Bitch Faced Bestie will be so proud!  The frames themselves have only been stacked up on the dining room floor for 3 years…..better late than never I guess.  Realistically I had been waiting to find all the pictures I want for the frames, but I think having them up will remind me to actually look for art to put in them.  I have a general idea of the pictures I want to hang, I’m just having a problem finding what I want.  So, I’m sure I will slowly start collecting art for my gallery, but even just having the frames up is making my dining room area feel much fancier!

IMG_9045

There is one frame missing still from the upper right hand corner, so don’t mind that hole!

Throwback and New School

The Engineer is at a work sponsored golf event for the night, so the lil Scout-a-Roo and I are blogging together on the couch old school style.  Throwing it back to our single girl days!  Not that we both don’t love having The Engineer around, but sometimes it’s nice to throw on some Sex and the City, pour some wine, and have yourself a nice girl’s night.  I have no idea what The Engineer is eating, but I had sushi and Roo had her regular crunchies with the added bonus of some leftover elk steak chunks and leftover elk burger.  Everyone was eating really good tonight at Casa (Mis)Happenings

Alrighty….down to business!  Technical errors from last week mean that I owe you a double blog of sorts.  It’s been a busy few weekends around here.  House projects, gardening, trips home and shopping with Momma…..so many things to do, so little time!

Slowly but surely I’ve been working on improving my backyard and patio situation.  It isn’t that my yard is bad, it’s well maintained, but I’m on a fairly busy corner and my yard is lacking in privacy and shade.  I want to extend my little patio pad, probably with some sample slabs from The Engineer’s company, but that seems like a lot of work…..especially when it’s still so hot out!  I don’t really need the shade, but on days when I want to be out reading, tanning, and enjoying a beer it would be nice for Scout to have a place out of the sun. Cue…..

IMG_8772IMG_8771


It provides plenty of shade, but is out of the way when it needs to be.  I got the umbrella stick part and the canopy from Cost Plus World Market, and the stand came from Menards.  I really only got the umbrella because it was on super sale one weekend, but I’m glad that I finally pulled the trigger on buying one!  I saved like $70 on the whole thing!!!  If you’ve never been to the World Market, you really need to find your nearest one and scope the scene!  I’ve bought a ton of stuff there…..jewelry, furniture, pillows, rugs, and food.  Everything is a bit in the style of Anthropologie or Restoration Hardware……but WAY CHEAPER!

Another major house update I accomplished recently was finally settling on a rug!  Momma has thought that my living room as always needed a rug.  Partly I’m sure to break the space up a little since I have a fairly open concept living room, kitchen, and dining room.  Secondly, to lighten up the super dark wood flooring the previous owners picked.

I’ve had a couple problems picking a rug.  First, most rugs in the size I need for my living room, at least 8×10, fall no where near the price point I’m willing to spend on a chunk of carpet.  Secondly, I’m not sure if you’ve noticed…..but there are way more ugly rugs than good looking rugs!

The colors I chose for the living room also didn’t help the rug hunt.  I have very dark floors, a metallic pearl couch, turquoise accent chairs and secretary, and a dark plum reading chair.  I wanted a traditional feel, but in modern colors.  Sort of like if Marie Antionette owned a townhome, simplified her need to gold, and embraced a modern color pallet.  Finding a traditional rug in those colors was a bit of a struggle.  Most were the wrong shade of blue, had weird pops of orange…….which why though……., or they were too dark to contrast with my floor.  Enter the Anastasia Collection by Loloi Rugs…..

anasaf-05sipl_lg.jpg

Stock photo from loloi.com because I’m bad at taking decent pictures.

The only name  can find for this rug is AF-05 Silver and Plum.  The base of the rug is a very light, slightly metallic silver, but against my floor it takes on a warmer shade of taupe-y silver.  I’m not sure that taupe-y silver is an actual color, but it is what it is I guess.  The turquoise in the rug perfectly matches my accent chairs, and the various shades of plum and eggplant coordinate nicely with my reading chair.  The only thing I don’t love with it is my little ottoman puff thing, but I could easily recover that.  It’s a pale cream floral print, and I’ve never been a huge fan of layering prints.  I know it’s a thing, but it just always seems weird to me.

IMG_8851

Laying out the monster rug, and someone wanted to help press out the wrinkles…….

IMG_8853

Wrinkle squishing was a serious job….but someone had to do it!

As you maybe can tell from the pictures, the rug looks darker in any light other than direct sunlight.  It also depends a little bit on which direction you brush the rug.  All in all, I really like it.  It keeps my couch from sliding backwards into the wall shelf, and it’s thin enough that it doesn’t feel like a chunk of shag carpet laying on my floor.  Momma keeps asking if I need a rug pad…..I’m not sure what that would accomplish, but the rug isn’t sliding around or moving so I’m leaning towards the not needing one side.

I’m not quite sure that we threw the rug down in the right location.  I mean, it’s underneath all the living room furniture which I know is important, but I’m still not super sure.  I’m sure that the next time Momma MisHappenings comes to the house we will fidget it around some.  I feel like that’s the sort of information Mommas are suppose to know…..how to connect a room with an area rug and how long to boil corn for.  Yes, I had to text and ask how long to boil corn for…..I cook a lot but every once in awhile you come upon something you took from granted and never had to make.  Apparently corn on the cob was that thing for me.

Besides moving furniture and laying out rugs, The Engineer and I also canned last weekend.  Well……mostly I canned and he watched.  He did help prep ingredients and wash green beans, but he decided he couldn’t stuff jars because his hands didn’t fit.  Dilly bean jar stuffing is a bit of an acquired art, so I guess I can’t really blame him.  He did take plenty of pictures, but please ignore the mess in my kitchen.  Between biking, breakfast smoothie making, canning, and just my regular messiness……my kitchen and I were disasters by the end of the day.  All in all we made 9 quart jars of dilly beans, and 7 jars of banana pepper rings.  Most of the banana peppers are in pints, but I had some random jelly jars laying around so I filled those up too.  Some of the jars even contain beans and peppers from my little garden plot.  It’s been nice to get veggies in quantities you can actually do something with, although I did still buy 8 pounds of green beans and a bucket of banana peppers from my favorite supplier at the farmer’s market.

Pirate Bunnies : Murder, Pillage, and Plunder

The Engineer and I planted a garden!  Most years I’ve just planted a few veggie plants in patio pots.  This year, we went all out with an actual dug in garden!  I had been meaning to get this done for a couple years, but I’m lazy and didn’t have a solid plan to deal with the sod once I dug it all up.  Cue…The Engineer’s truck!  He maybe drove around with a slightly soggy, boggy situation in the truck bed for a week…..but I offered to help him get rid of it and he wasn’t feeling my initial dump off location!

IMG_8467

The prime location!

IMG_8490

Day 1 progress…..The Engineer is good with a shovel, and I’m a good sod puller!

We got really ambitious after getting the HOA board’s approval.  It seemed like a nice early warm spring, so we got to work right away with visions of epic gardening in our heads.  Well….idk about his head, but in my brain I was going to have a big garden with lots of happy plants that would supply me with tasty snacks and food all summer long.

The sooner you start the sooner you get to eat yea!?

img_8507.jpg

There were a few days when I started to question garden placement…..things got a bit soupy.  Also….notice the mostly dead spirea that I eventually dug out.  Extreme gardening happening at Casa Miss Happenings! Slowly, the swamp dried out and we got everything tilled and planted.  It turns out that the soil in my yard is mostly clay, so I ended up adding several bags of top soil into the garden.  I didn’t buy great soil, actually….I bought the cheapest kind Menards has.  This was maybe a bad choice?!  I’m not sure, we will find out……live and learn I guess.

The years crop included  4 tomato plants, 3 varying pepper plants, two large rows of green beans, and some spaghetti squash.  I also planted a pot of kale and mixed lettuce, a pot of kohlrabis, and two pots of herbs which include two different types of basil, thyme, and oregano.    I also have two decorative pots of pansies and petunias.  I hate petunias….but they are what grows here so whatever I guess.  Everything seemed like it was coming together….and then disaster struck!

IMG_8549

IMG_8550


Remember how I said we started early because things seemed warm and happy and springish?!  Well……I maybe got a bit over ambitious.  I ended up loosing my first batch of tomato plants because I forgot to bring them into the garage during one of our spring cold snaps.  So…..there was that!

2017 Plant Deaths — A Running List

  • 3 Cherry Tomato Plants

Tomato plants are cheap, so I quickly rebounded from that initial downfall.  Everything really seemed like it was coming together…..I had gotten the dead spirea dug up and thrown into the back of The Engineer’s truck.  One night we may or may not have driven out into the country and tossed the plant and the leftover small pieces of sod into a ditch.  The large chunks of sod went to a coworker’s new house while they await landscaping….her dog needed a pee patch!  Sometimes The Engineer and I like to do “dirt kid hood rat things”….actually, that might have been our first ‘delinquent’ move together. The couple the dumps sod together stays together?!

After we conquered the sod and dead tomato issues…..came the bunnies.  Fucking herds of spicy pepper loving bunnies.  The Engineer even talked to some guys who gardens at his work and they assured him that bunnies are no problem because they don’t like the spicy peppers.  Well……the bunnies in my yard ate my peppers from spiciest to mildest.  I’m not sure what they says about them……but I’m sure if you ate one they would be well spiced and delicious!

2017 Plant Deaths — A Running List

  • 3 Cherry Tomato Plants
  • 1.5 (approximation based on remaining growing time) Pepper Plants

To combat the herds of capsaicin loving furry woodland creatures, we had to build emergency fences around all the pepper plants.  All 3 of the initial plants survived, but the banana pepper took the hardest beating.  He’s trying really hard to recover and grow, but I’m afraid he won’t make it before winter comes.  The Engineer decreed that a flowering and fruiting banana pepper plant was a garden requirement, so we bought a new one and transplanted in where the abused plant sat.  We moved the little abused one into the corner and gave him a protective cage.  He’s starting to leaf out slightly, but when you’ve been eaten down to a 3 inch stump in the ground….you’ve got a lot of growing to catch up on in a short growing season!

winter-is-coming-winter-is-comingwait-not-its-not-omg-i-actually-think-its-comingnope-warm-again

Maybe if we have a winter like this…..my abused pepper plant could recover fully.

Everything seemed to be going along well for a couple weeks…..and then disaster struck again!  The bunnies attacked and murdered my pot of kohlrabi……just murdered them and threw their tattered and torn leaves all over the back yard.  Honestly, I’m not even sure why I even bothered to plant a pot of kohlrabi…..last year they didn’t grow at all!  Well….I mean they grew leaves…..but I didn’t end up with the desired, baseball shaped orb of deliciousness.  Round two seemed to be growing well this summer, so I thinned the plants to create more growing room.  Then……as if they sensed the vulnerability in smaller numbers….the bunnies made a night attack!  Ughs…….

2017 Plant Deaths — A Running List

  • 3 Cherry Tomato Plants
  • 1.5 (approximation based on remaining growing time) Pepper Plants
  • 5 Kohlrabi Sprouts

I watered the pot for a couple days, but none of the thinned out roots looked like they were going to take off again.  I ended up planting a few rows of kohlrabi seeds at the front of the garden, and I’ll just have to wait and see what comes of those.  Funny thing…..we actually bought a new pepper plant for the pot of soil because we thought that the bunnies had somehow gotten under the protective fence on my abused little banana pepper and finished him off.  We pouted around for a couple days thinking we had been out maneuvered by some bunnies…..only to discover that the little guy had gotten covered over by some dirt!

IMG_8656

We also replaced several plants around my property with boxwood plants.  We dug up 3 sad little day lilies and a decorative grass out of the front yard bed and replaced them all with tiny, little baby boxwoods.  We had to drive all over town one weekend to find four matching boxwoods….but I love them.  Boxwood just has a particular smell that reminds me of vacations to Virginia, they are always green, they are low maintenance, and look like something, and mostly they are just my jam.  Don’t know what to plant…..why not a boxwood?!  I also replaced the mostly dead spirea with a slightly larger boxwood….hahah cuz of course I did!

IMG_8657

2017 Plant Deaths — A Running List

  • 3 Cherry Tomato Plants
  • 1.5 (approximation based on remaining growing time) Pepper Plants
  • 5 Kohlrabi Sprouts
  • Various Flowers, Lettuce, and Kale Leaves

Last night we had a pretty major storm, and I was pretty nervous about the survival of all of my veggies.  I’m happy to report that everything survived the wind, hail, and rain.  Now, if I can just keep the bunnies away from the beans and my lettuce we will be all good in the hood!

IMG_8658

Squash and two happy little bean rows…..who’s getting excited for veggies?!?!?

Time to Get my Booty in Gear

I’m generally not one for recording goals.  I think everyone has goals that they mull over in their minds, but it’s often said that the most productive people write down their goals so that they can actually see them.  I’ve sometimes debated creating journals and lists for myself, but I know myself well enough to know that I’d probably do it for a week or two….but my commitment to these things never lasts very long.  Really, my commitment to most things only lasts until I forget to do it once and then it’s just all over.  Taking vitamins…..solid for a week or two at a time until I space it off one night and get out of the habit.  Honestly, this blog is one of the longest things I’ve ever committed to……and even on this I’ve missed a couple posts here and there…..like last week for instance!

I’m not interested in books like 50 Shades of Grey okay?!  I’m interested in the life changing magic of tidying up.  That’s right, how to declutter my home to achieve inner peace, and my optimum level of success!  That’s what your 30’s are about.  How can I turn this shit around?!  I’m a horrible person, I’m not happy with where I am.  How can I turn this shit around?!  Help me Tony Robbins, help me! — Ali Wong

So, in an effort to try and motivate my nearly 30 something life towards my maximum level of success….I present THE TO DO LIST!

  • Work to double my number of followers on social media — I have little to no idea how I’m actually going to accomplish this, but I’m hoping that people will just start to realize the amazeballsness that is me and decide to come along for the ride?!
  • Upgrade my blog account to look more professional — I’m thinking I’ve reached a place where I should take the plunge and fork over the cash money to buy my URL outright.  I’ve stuck with this long enough that I think it’s officially a thing.
  • Prepare, practice, and study to perform a successful turkey hunt this fall — Okay, so there’s nothing saying that every hunting trip is successful, that’s why it’s called hunting and not shooting.  However, I have good feelings about trying to get ready for a hunt.  I didn’t buy the bow with the intention of hunting,  but turkey tags are relatively inexpensive, I’m in charge of Thanksgiving so I obviously need a turkey, and I feel like this plan will help keep me motivated to hit the ranges.
  • Recommit myself to my fitness, specifically cardio — I say that like this isn’t Easter weekend and I’m not just lounging around munching and snacking.  However, I have recommitted myself to sculpt and rowing classes at the gym.  Also, summer time is coming and that means bike time on the trails with Pimp Money and his wife, so maybe I’ve sorta got this in check?!
  • Finally motivate to do the yard updates I’ve wanted since I moved in —  I can’t guarantee that I’ll be allowed to make these updates.  Mostly this sits in the hands of the HOA board.  However, if they approve my plans I’ll have to put them into action.  I took the first steps tonight by finally emailing the board with my requests, so now we just have to wait.  Approval will mean some digging and serious time in the yard ripping out and replacing plants, and digging up grass for a garden!

I’m not sure what kind of optimum levels my success will reach, but sometimes I think it’s important to take steps to over ride your inner lazy girl.

Whoopsy

I know I didn’t get a blog posted last week, but it’s been a busy week here at the Townhome. I’ll post a huge blog with all the details this week I promise!!

Until then, have a couple preview pics!

image

image

I hope everyone had a happy and safe Memorial Day weekend. More than that, I hope everyone remembered “the reason for the season” so to speak. It’s about way more than a long weekend and having a good time in the sun.